)
Geo-referenced raster files which do not use standard OS naming conventions
Raster files which are not geo-referenced
Computer memory requirements for raster data
Raster data may be thought of as a "dumb picture". These pictures are made up of tiny picture elements known as pixels. Each pixel is generally represented by a number denoting its colour. In Microsoft Windows, the standard format for raster data is known as a Bitmap. Files with the .bmp extension are bitmaps. SIS is able to display Windows Bitmap files, whether they are uncompressed or compressed as Run Length Encoded (RLE) bitmaps. Other raster formats such as PNG, TIFF, RLC and JPEG may also be displayed. See Dataset Formats and Raster file for details.
SIS enables you to use raster data as well as vector data, although you should be aware that raster data occupies much more disk space and memory than vector data.
Raster data may be pasted onto an editable overlay, using Paste From [Home-Clipboard], or opened as a dataset using Add Overlay [Home-Map].
After a bitmap has been inserted into a dataset, it exists as an item class Bitmap, and can be selected by clicking on its boundary, or on the picture itself with the Raster snapcode. The cursor shows the raster snapcode when it is on the boundary of high and low contrast, e.g. the edge of a black area on a white background.
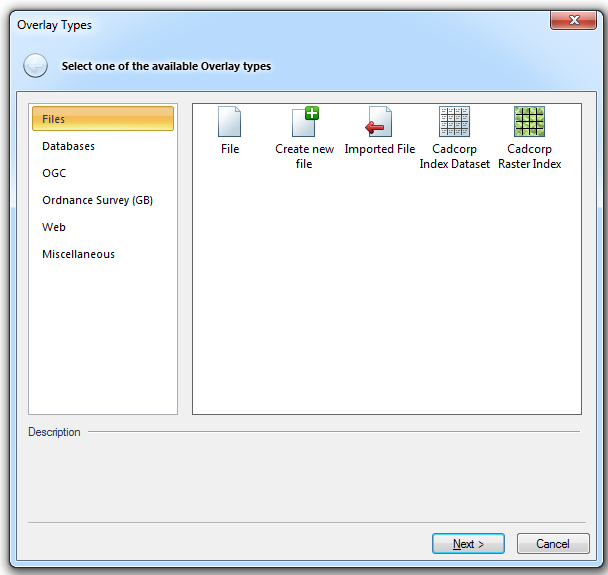
Geo-referenced raster data may be included as overlays, like any dataset, using the File, Imported File, or Cadcorp Index Dataset options in the Overlay Types dialog. Index datasets provide a good method for handling large amounts of spatially-referenced raster data, because it makes fewer demands on the computer’s memory resources.
If raster data is not spatially-referenced, you can still place it at an exact map location if required. See Geo-referenced raster files which do not use standard OS naming conventions.
SIS automatically detects whether the file is compressed, and what form of compression has been used. Compression types supported are TIFF (Packbits, Huffman, CITT Group 3, CITT Group 4), JPEG, PNG, RLC and MrSID. SIS supports top-left and bottom-right orientation TIFF files.
Overlays should be re-ordered to ensure that overlays containing raster data are drawn first. If raster data is drawn on top, all data underneath is covered. See Order of the overlays.
In the case of black and white raster data, the white parts can be made transparent, allowing you to see through it to the data beneath. To achieve this, set the overlay Brush to Hollow, and select the Brush override. You should be aware that the darker a transparent Brush, the less you will see underneath.
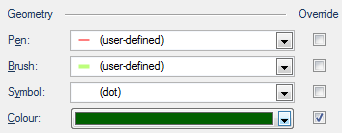
Checking the Overlay - Colour - Override tickbox on the Styles tab of the Overlays dialog enables you to display the black part of a black and white bitmap in any colour you choose:
With reference to manipulating raster data, you should be aware that this is handled in a completely different way from vector data.
You may have raster files which are spatially referenced but do not correspond to any of the naming conventions understood by SIS.
There are two methods of putting such files in their correct spatial location:
In the case of BMP files, JPEG files, RLC files and TIFF there are two options: an ordinary file or a linked file. Use the linked option, if possible.
The ordinary file option, Insert from Image [Create-Miscellaneous]), copies the contents of the chosen raster file into the current overlay.
This copy then remains unchanged even if the original file on disk is edited or even deleted. However this can make your overlay very large and is therefore best used with small bitmaps, such as a logo.
The linked file option has an identical effect visually, but instead of copying the contents of the raster file, it creates a link to the chosen file. If the computer requires memory currently taken up in displaying the raster image, a linked bitmap can be removed from memory to free up some space. This has the advantage of making far less demand on the computer’s memory resources, and allowing larger (in file size) bitmaps to be displayed.
The method of inserting a linked is described in the Insert a linked image subsection of the Insert from Image [Create-Miscellaneous] command.
Disadvantages of linked files are that they cannot be edited in SIS (e.g. rubbersheeted), and if the file is deleted from disk, the image will also be removed from your map window.
A raster file which is not geo-referenced, or which does not use the standard naming conventions (e.g. SS7887nw), can either:
When loading JPEG multi-level files, four bitmaps are created, each with a different resolution and item scale threshold. SIS will then load whichever bitmap has the most appropriate resolution, dependent on how far in or out the view is zoomed. This gives a clearer image at all screen scales, but has the following disadvantages:
Raster data files can be very large. If you are making extensive use of raster data, not only do you require plenty of disk space in which to store it, but your computer will also need large amounts of memory (RAM) in order to manipulate it. We recommend that you fit as much memory to your computer as you can.
If you are using large amounts of raster data and experiencing memory problems, SIS provides the following possible solutions:
for geo-referenced data - use indexes. Also, consider using, or converting your data to, a memory-efficient data format, such as ER Mapper’s Enhanced Wavelet Compression Wavelet (*.ecw) or LizardTech’s MrSID (*.sid).
for data which is not not geo-referenced - if you are using bitmaps, JPEG files, RLC files or TIFF format, use the linked option, see Geo-referenced raster files which do not use standard OS naming conventions.
SIS automatically switches off the display of raster data if the pixels are magnified above a preset limit, or if the view is zoomed out to a point where the pixels would be closer together than a preset limit.
You may override the preset display limits by setting the Maximum scale and Minimum scale properties of the raster file. See Scale.
By setting appropriate scale thresholds, you may superimpose colour with black and white raster maps such that, as you zoom in, the display automatically switches from colour to the more detailed black and white map.
Rotated or mirrored bitmaps require a lot of memory in order to display them. If you are having problems displaying rotated or mirrored raster files, you can choose to display them in outline only.
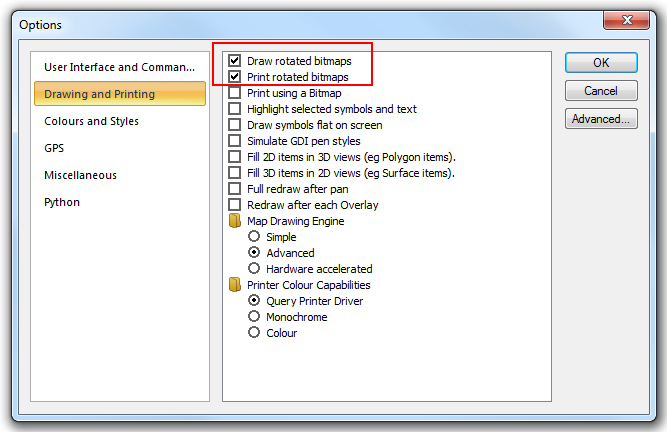
If the Draw rotated bitmaps option is un-checked (and rotated bitmaps therefore appear only in outline), you can still select any individual raster file and choose to have it displayed:
Send comments on this topic.
Click to return to www.cadcorp.com
© Copyright 2000-2017 Computer Aided Development Corporation Limited (Cadcorp).