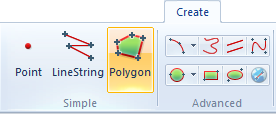
See Polygon [Create-Simple] for details of creating a Polygon item.
A Polygon item is a distinct class of item with its own set of properties. Polygon items include:
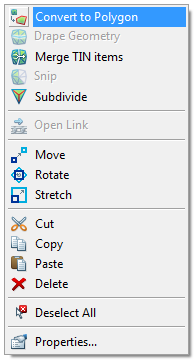
Closed LineString items created with LineString [Create-Simple] and Freehand [Create-Advanced] are not Polygon items. However, any LineString item, whether it is closed or not, can be converted into a simple Polygon item using the Convert to Polygon local command:
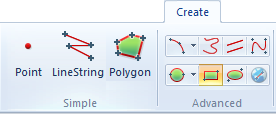
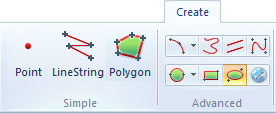
Polygon items can be created using the Polygon, Rectangle, Ellipse and Circle commands:
See Polygon [Create-Simple] for details of creating a Polygon item.
See Rectangle [Create-Advanced] for details of creating a Rectangle or Square.
See Ellipse [Create-Advanced] for details of creating an Ellipse or Circle.
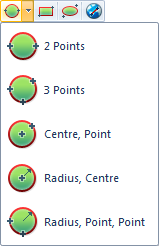
The Circle[Create-Advanced] commands enable you to construct circular Polygon items using any of five methods:
Centre, Point [Create-Advanced]
Polygon items can subsequently be converted to LineString items using Unfill [Create-Edit].
Note: The following commands are not available in Map Manager.
Use Fill [Create-Edit] to turn a closed LineString item into a Polygon item.
LineString items that are not closed can be converted to Polygons. See the local command Convert to Polygon.
A Convex Hull is a convex outline drawn around the selected geometry. This usually results in a Polygon item, but a convex hull created from a point item is a point, and a convex hull from a single LineString segment is a LineString.
See Convex Hull [Create-Edit] for details of creating a Convex Hull.
Sometimes you may want to draw a Polygon with a thick outline, and determine whether the pen thickness is offset to the inside or the outside of the Polygon. For instance, UK County boundaries are often drawn with shading to the inside of the boundary. This is easily achieved by using a pen with an offset.
A pen’s offset is always placed to the left of the LineString item, when looking along it in the direction in which it was drawn, see Creating, Choosing and Editing Pens. Polygons drawn in an anti-clockwise direction will therefore have their offset on the inside, and those drawn clockwise on the outside.
Whether a Polygon is clockwise or anti-clockwise is indicated by the Clockwise property being shown as True or False in the Properties of Polygon dialog, accessed from the right-hand mouse button:
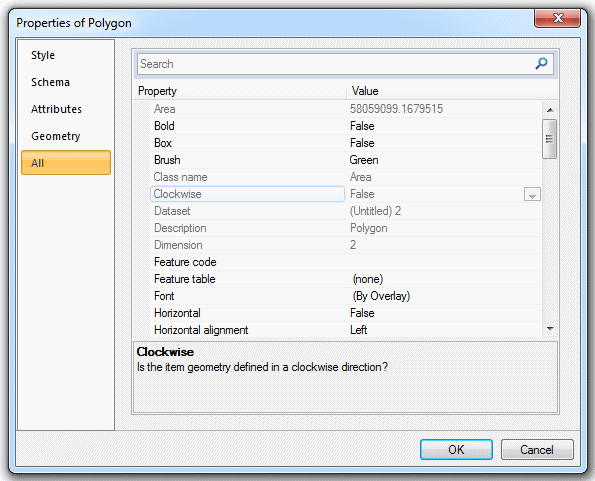
You can change this by selecting the Polygon and using Reverse [Edit-Geometry].
A MultiPolygon is a collection of Polygon items, which can be moved and manipulated as a single item. All its component Polygons are drawn with the same style.
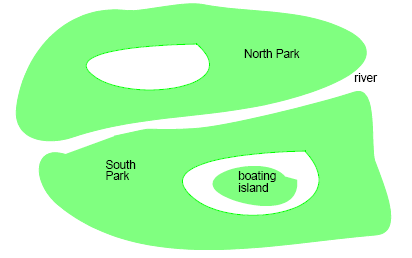
SIS complies with the OGC Simple Features Specification, which says that a simple Polygon must be connected (that is, it can have holes but it cannot have islands). MultiPolygons are therefore used for regions which have islands. For instance, the whole of this park could be a MultiPolygon:
See Add Geometry [Create-Edit].
The Analysis-Boolean commands are as follows
These commands can be used to create new Polygons by combining existing Polygons in different ways. See Editing Polygon items.
The result can be a simple Polygon item, or a MultiPolygon.
Note:Analysis-Boolean commands are not available in Map Manager.
The options on the Geometry tab of the Find dialog, when used in combination with Polygon items, provide a useful tool for finding all items with a certain spatial relationship to the Polygon. For example, they might have to fall within the Polygon, overlap it, or touch it, etc.
See Find [Home-Selection] for details of selecting items. See also Selecting graphics.
A buffer is a zone of a user-specified size around selected point, LineString, or Polygon items. It allows you to see a polygon of influence, giving an immediate visual indication of the proximity of other items to the selected items. A buffer can be a Polygon or a QZone.
Existing items are used to create Polygon or QZone buffers. The buffer is created in addition to the existing items (it does not replace them). To do this, select the item and use Polygon [Analysis-Buffer] or QZone [Create-Miscellaneous].
Thiessen Polygons are Polygons of influence which are automatically calculated for you, based around items you have selected. Adjacent Polygon items are created whose boundaries are equidistant from the selected items.
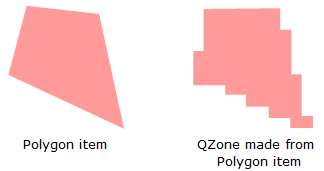
A QZone is a raster Polygon item which is made up of very many squares of different sizes. If the cell size is large enough, you will see these squares on the QZone outline. If they are not, you can zoom in to see them.
When dealing with large Polygons, it is sometimes better to use a QZone buffer rather than a Polygon buffer. The squares which make up a QZone are regularly sized, so they provide a more efficient, and quicker, method of modelling buffers. Operations such as detecting whether a point is inside a large QZone is faster than detecting whether the point is inside an equivalent Polygon item.
In general, if you have a large irregular outline, such as a coastline, a QZone takes up less memory and therefore operates more quickly than a Polygon of comparable dimensions. However, QZones are less accurate than Polygon items.
For further information regarding QZones see: http://www.cse.iitk.ac.in/~amit/courses/751/98/sraos/index.html
If you require Polygon items which are aware of their spatial relationships with one another (for example, Administrative Districts whose boundaries can change) you should use Topological Polygons.
Send comments on this topic.
Click to return to www.cadcorp.com
© Copyright 2000-2017 Computer Aided Development Corporation Limited (Cadcorp).
.GIF)
.GIF)
.GIF)
.GIF)