Editing the contents a Map Frame
Removing the map data from a Map Frame
Moving a Map Frame on a template
Editing the outline of the Map Frame
Panning the view in a Map Frame
Adding a key map, a north point or a scale bar
Manipulating the overlays in a Map Frame
Creating a window containing the datasets defined in a Map Frame
A Map Frame item is an image of one window placed in another window. Any changes to the data in the original window will be reflected in the Map Frame contents. The graphical contents of a Map Frame cannot be selected although the scale and angle of Map Frame contents can be modified.
Map Frame items are similar to Polygon items and share many of the same properties (Brush, Pen, etc.). They can also be resized and copied so that there can be multiple views of the same map at different scales on one Print Template.
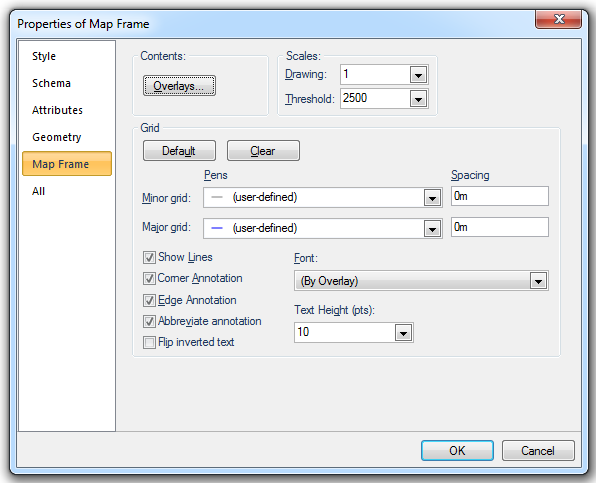
As well as the normal property tabs (Style, Schema, Attributes, Geometry and All) there is a tab for Map Frame. Here a grid can be added, the Overlays dialog can be accessed, and the drawing and threshold scales can be changed.
Different scales can be achieved by changing the Map Frame Drawing Scale in the Properties of Map Frame dialog, in addition changing the Threshold Scale means the displayed data will meet the criteria of the Threshold set in the original SIS Workspace Definition (SWD).
There are several furniture items that can be associated with Map Frame items:
The data in a Map Frame item cannot be edited as its contents are merely a reference to a map view. However, once a Map Frame contains an image, the overlays to which it refers can be manipulated.
Select Properties [Home-Selection], select the Map Frame tab on the Properties of Map Frame dialog, then press the Overlays... button. This will display an Overlays dialog identical to that displayed by Overlays [Home-Map]. The contents of a Map Frame item can be changed to show the current state of any datasets you choose, and you have control over the appearance of those datasets just as if you were manipulating a SWD file.
Any changes to the Map Frame contents will have no effect on the content of the SWD from which the Map Frame was taken.
To remove the contents of a Map Frame so that it becomes empty:
You can move a template by clicking on its outline and dragging it. Alternatively use the local command Move.
As a Map Frame item is a sub-class of a Polygon item, it can contain loops and can be edited as with a Polygon item
Adding loops to a Map Frame item enables you to "crop" the map view to show specific areas of interest. It is also possible to use Move [Edit-Geometry] on a Map Frame item to take a copy of it by holding the Ctrl key down as you move it and place it. Then, by editing the overlays, you may have several Map Frame items on the same sheet, each illustrating different aspects of the map base.
You can change the size of a Map Frame item to show specific areas of interest. It is also possible to use Move [Edit-Geometry] on a Map Frame item to take a copy of it by holding the Ctrl key down as you move it and place it. Then, by editing the overlays, you may have several Map Frame items on the same sheet, each illustrating different aspects of the map base.
A Map Frame has the local command Pan Contents, which allows you to shift the view of the map base it contains. Click a “from” point (a point to be moved), and a “to” point (where the first position will be moved to). Instead of the “to” point, you can press Enter to place the “from” point in the centre of the Map Frame. (However, you cannot snap to items within the Map Frame.)
A Map Frame’s properties can be edited in the Maps Control Bar. Alternatively, the Properties of Map Frame dialog can be accessed using the Map Frame’s local command Properties..., or by using Properties [Home-Selection].
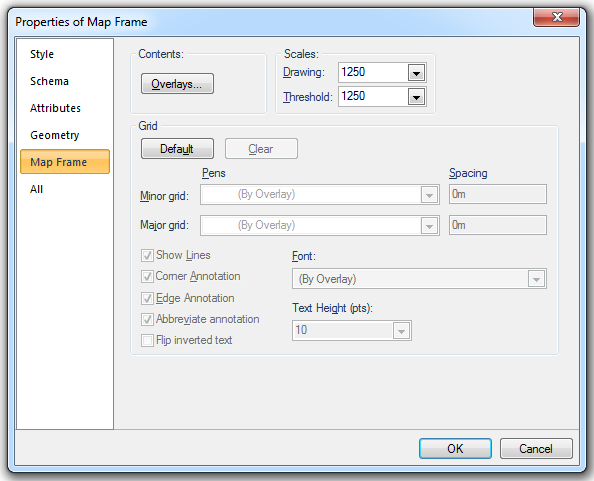
All the settings of the Map Frame’s grid can be changed here.
Contents
Overlays...
Edits the Map Frame overlays. Click to display the Overlays dialog to allow the required overlay to be selected.
Scales
Drawing
The scale of the Map Frame contents.
Threshold
Generalisation scale for Map Frame contents. Generalisation is the process of simplifying the graphics by skipping vertices, and skipping items. This should usually be the same as the Drawing scale.
Grid
Default
Create a default grid for the Map Frame.
Clear
Clear the grid from the Map Frame.
Minor grid
Pens - select the pen to be used for the minor grid from the drop-down box.
Spacing - specify the spacing between the minor grid lines. A spacing of 0 (zero) will prevent the display of the lines.
Major grid
Pens - select the pen to be used for the major grid from the drop-down box.
Spacing - specify the spacing between the major grid lines. A spacing of 0 (zero) will prevent the display of the lines.
Show Lines
Uncheck this tickbox to suppress the display of grid lines.
Corner Annotation
Uncheck this tickbox to suppress the display of the special annotation at the corners of the Map Frame.
Edge Annotation
Uncheck this tickbox to suppress the display of the special annotation along the edge of the Map Frame.
Abbreviate Annotation
Check this tickbox to display only the changing portion of the edge annotation.
Flip inverted text
Check this tickbox to flip upside down text when viewed from the bottom of the Map Frame.
Font
Font to use for grid labels.
Text Height (pts)
Text point height to use for grid labels.
A Map Frame also has the properties Map Frame scale and Map Frame angle. These are the settings you chose in the Select Print Template Map Window Scale and Angle when placing the print template:
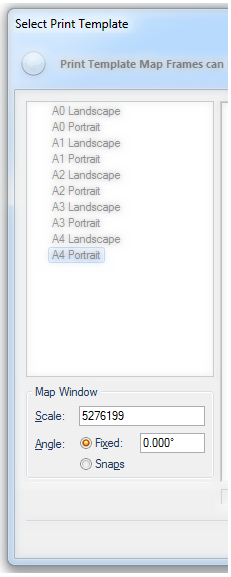
These values can now be changed retrospectively in the Properties of Map Frame dialog. Changing the Map Frame scale increases or decreases the area of graphics covered by the Map Frame (the actual Map Frame size is unaffected). The graphics and the text on the map therefore appear larger or smaller.
The Map Frame threshold property dictates what items are drawn, without affecting the scale of the output in any way. The initial Map Frame threshold will be the same as the Map Frame item's scale. Choosing a different Map Frame threshold will mean that the data displayed in the Map Frame (and printed) will be the same as that which is displayed when zooming to this particular scale. For example, Ordnance Survey MasterMap Topography layer is automatically set to a scale of 1:1250, therefore, if you zoomed to 1:2500 on screen, building seeds would disappear. Similarly, by choosing a Map Frame threshold of 2500, building seeds will not appear on the print.
Many items in mapping datasets have their own scale ranges within which they are visible. The Map Frame threshold scale is compared against the scale range for each item inside the Map Frame to determine which items to draw.
If you have created a print template without a graticule, and saved it as a SWD file, you can still add a graticule at a later date, using the Map Frame local command Create Graticule:
The Graticule Style dialog will be displayed:
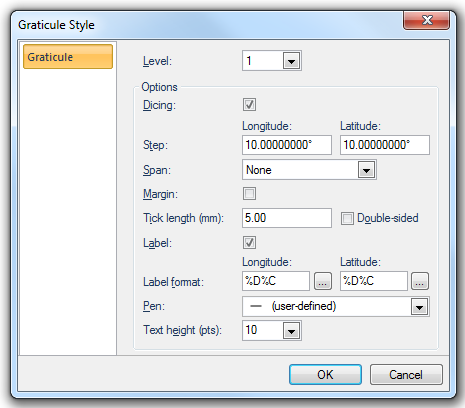
See Add graticule(s) section of Print Template.
You can select a graticule by using the S snapcode when clicking on the Map Frame to call up the Select Item dialog, then choosing graticule from the drop-down list. You can then change any of its properties. Alternatively, you can edit a graticule’s properties by selecting it in the Libraries Control Bar and using its local command Properties....
A graticule also has the item commands Store style... and Recall style....

|
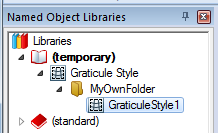
Store style... allows you to save the graticule style as a named object in the current library:
When stored graticules exist, the Recall style... command will be active and can be used to apply a stored graticule style to the current graticule, keeping the border but losing the existing style.
If you have prepared a print template without a key map, a north point, or a scale bar, you can add one retrospectively, using the Map Frame’s local commands Create Key Map..., Create North Point..., or Create Scale Bar....
To be able to add a key map there must be at least one named item whose name begins with “*km.” in the current libraries. See Creating your own key map section of Print Template.
To add a north point symbol, there must be at least one symbol with a name beginning “*np.” in the current libraries. See Add North Point(s) section of Print Template.
To add a scale bar, there must be at least one symbol with a name beginning “*sb.” in the current libraries. See Add Scale Bar(s) section of Print Template.
If the print template contains themed overlays, you can add their legends to the template, using the Map Frame local command Legend.
Select the required legend, then click to place it on the template.
The overlays in a Map Frame cannot be edited - this must be carried out in the original map window.
However, when the original dataset and the newly created Map Frame are open changes made to the overlays in the original map window can be generated in the Map Frame by selecting the Map Frame window and using Regenerate [Home-Map]. Once these datasets have been saved and re-opened this link no longer exists and no further changes may be made this way. This dynamic link is to non-internal datasets only, it is not linked to SWDs and is therefore lost when the SWD or the Map Frame are saved and re-opened.
The overlays in the Map Frame can be manipulated separately from those in the original map window (e.g. made invisible, filters applied, etc.).
Any changes made here affect the Map Frame only. They do not have any effect on the overlays in the original map window.
Once a print template has been created, you can edit the Map Frame, and even make copies of it so that you have more than one Map Frame on the template which can be set to different scales using their Map Frame Properties.
Above are two Map Frames side by side on the same template. The left hand Map Frame has a scale of 1:1250. The right hand one has a scale of 1:50 000.
You may save your modified print template as a SWD. When you recall this SWD, it will display the current contents of the datasets to which it refers. If any of these datasets have changed, the changes will be reflected in the Map Frame item. You may therefore want to look at the map itself, to review the changes or to carry out further modifications. To see the "original" map displayed in a Map Frame item, select the Map Frame, and choose Create Map Window [Paper-Map Frame]. This will create a new window, opening the necessary datasets as defined by the Map Frame item overlays.
Create Map Window [Paper-Map Frame] copies any internal overlays, breaking the link with the original SWD. Therefore if you use Create Map Window [Paper-Map Frame], and then edit the graphics in internal overlays, you will have to use Refill [Paper-Map Frame] to update the Map Frame item. (This does not apply to Cadcorp Base Dataset and other file-based datasets, or database-based datasets.)
Send comments on this topic.
Click to return to www.cadcorp.com
© Copyright 2000-2017 Computer Aided Development Corporation Limited (Cadcorp).